Fogging
Determination of the fogging behavior of materials used in vehicle interiors
FOGGING TEST IN THE
AUTOMOBILE INTERIOR
PRECISE MEASUREMENTS FOR THE HIGHEST QUALITY
Coating thickness measurement is a central component of quality control in the manufacturing and automotive industries. It ensures that materials and coatings are not only functional and durable, but also visually appealing. Precise measurement methods can be used to assess the quality and uniformity of coatings, making products more resistant to environmental influences such as corrosion, UV radiation and chemical stress. In addition, coating thickness measurement enables the early identification of weak points, which contributes to the optimization of production processes and increases overall product quality.
Determining the coating thickness plays a decisive role in modern production. A uniform coating layer not only improves the appearance, but also ensures high corrosion resistance and durability. With our precise test methods, we deliver the reliable results you need to optimize your products and meet the highest requirements.
Our coating thickness measurements include both non-destructive and destructive methods. In non-destructive methods such as magnetic induction or eddy current testing, the component remains intact, while in destructive methods samples are taken and analyzed microscopically or chemically. Both approaches provide precise data that enables a comprehensive evaluation of the coatings. During the test, several measuring points are defined on the surface in order to obtain representative results. The data collected is documented in detail and provides a sound basis for evaluating product quality.
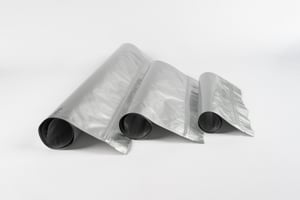
Our tests are suitable for a wide range of materials and components. These include metals, plastics and composites as well as vehicle bodies, machine components, household appliances and other coated surfaces. For the tests to run smoothly, it is important that the samples reach us in a clean, undamaged condition and in shockproof packaging. Information such as coating type, coating system and coating process also help to evaluate the results optimally.
Coating thickness measurement is not only a decisive factor for quality assurance, but also strengthens your customers' confidence in your products. Our experts are always available to answer your questions or provide advice and support you in raising your products to a new level of quality. Contact us and benefit from our expertise in coating thickness measurement!

Coating thickness measurement Test methods
- BMW AA-0254
- DIN EN ISO 1463
- DIN EN ISO 2177
- DIN EN ISO 3497
- PSA B15 4140 § 3.2.1
- and much more.
Fogging test methods
- DIN 75201-A (reflectrometric)
- DIN 75201-B (gravimetric)
- PV 3015 (Volkswagen)
- GMW 3235-A (General Motors Worldwide)
- PSA D45 1727
- and much more.
Are you looking for an exam? Standard? Specifications?
Accredited & certified tests
CONTACT OUR EXPERTS
Description. Lorem ipsum dolor sit amet, consetetur sadipscing elitr, sed diam nonumy eirmod tempor invidunt ut labore et
- Tab Title


- 01 Purpose of the coating thickness measurement
- 02 Test methods
Purpose of the coating thickness measurement
- Ensuring the quality, functionality and durability of coated materials.
- Evaluation of resistance to corrosion, UV radiation and chemical influences.
- Identifying weak points and optimizing production processes.
- Ensuring a uniform coating layer for aesthetic and technical requirements.
- Compliance with norms and standards and strengthening customer confidence in product quality.
Test methods
- Non-destructive testing: Magnetic induction or eddy current methods measure the coating thickness without damaging the material (only suitable for metallic substrates).
- Destructive testing: Small material samples are taken to determine the coating thickness using microscopy or chemical analysis.
- Carrying out the measurement: Several measuring points are defined on the surface. The number of measurements varies depending on the size and type of sample to ensure representative results.
Frequently asked questions about the fogging test
The sample quantities required for a fogging test depend on the standard and the test method used. Here are the general guidelines:
1. standard DIN 75201 (type A and type B)
-
Type A (glass plate method):
A sample quantity of 10 cm² is typically required. The sample is placed on a heated plate in a sealed chamber and the volatiles released condense on a glass plate above. -
Type B (aluminum foil method):
Similar to type A, a sample volume of approximately 10 cm² is used. However, the volatile substances condense on a cooled aluminum foil.
2. standard ISO 6452 (international standard)
- Sample quantity:
Again, a sample size of about 10 cm² is typically required to evaluate the amount of volatiles released at elevated temperature.
3. other specific requirements
Depending on the specific requirements of the customer or OEM standards, sample quantities may vary. It is important to check the respective standards or test requirements carefully.
Method A - Reflectometric method:
- Principle: This method measures the change in reflectivity on a glass plate on which volatile components from the material sample are deposited.
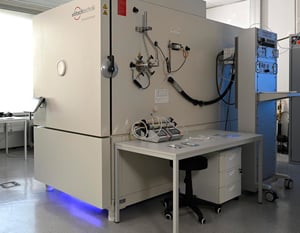
- Procedure: A material sample is heated in a beaker while a glass plate above it is cooled to 21°C. The temperature difference causes the volatile components to condense on the glass plate. The reflectance index of the fogged glass plate is then measured to determine the amount of condensed material.
- Application: This method is particularly suitable for materials for which an exact determination of the optical fog effect is required.
Method B - Gravimetric method:
- Principle: This method measures the weight of condensed volatiles on an aluminum foil.
- Procedure: The material sample is heated in a beaker while an aluminum foil disc is cooled to 21°C. After 16 hours, the amount of condensed material on the foil is weighed.
- Application: This method is ideal for an accurate quantitative determination of the amount of condensed volatiles.
CONTACT US
CORROSION
Formaldehyd in Fahrzeugen: Herausforderungen für die Automobilindustrie
Read moreStellantis: Freigabe für Emissionsprüfungen erfolgreich (VIAQ)
Read moreVDA 277 vs. VDA 278: Was ist der Unterschied?
Read moreGeruchsunterschiede bei Polypropylen: Die Rolle von Faserverstärkung und Verarbeitungsparametern
Read moreWarum sind die Einheiten der Ergebnisse von Prüfungen der Werkstoffemissionen eigentlich so unterschiedlich?
Read moreGrenzwerte für Formaldehyd und Formaldehydabspaltern in Fahrzeugen
Read moreFREQUENTLY ASKED QUESTIONS ABOUT COATING THICKNESS MEASUREMENT
Non-destructive methods such as magnetic induction and eddy current methods are used, as well as destructive testing methods such as microscopic and chemical analyses after sampling. The choice of method depends on the material and requirements.


